Prelude
*This note is mainly to record how to setup Raspberry Pi as file server.
Prerequisites#
- You have a Raspberry Pi with pre-installed raspbian SD card
- You are happy to get your hands dirty
- You have some basic computer concept.
- RPi is short for Raspberry Pi
My Raspberry Pi is a bit old#
I only have the RPi 1 model B with pre-installed raspbian SD card in place. It is quite outdated. If you don’t know the model of your RPi, please don’t worry it now. I will explain how to get the info later. I got this RPi as a gift 2 years ago. I left it in the garage and totally forgot it, until I cleaned up my garage a couple months ago. Actually I loved the old model with transparent plastic box more than the new one. I knew if I continued to leave it in the garage, it would be a rubbish soon, because it is not easy to find some equipment or software compatible with the old RPi. Luckily the lifespan of RPi is much longer than the mobile phone, but it still took me some effort to setup the wifi adapter.
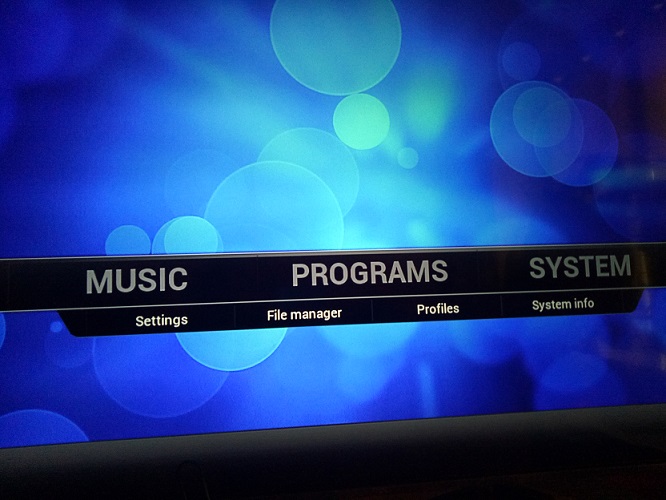
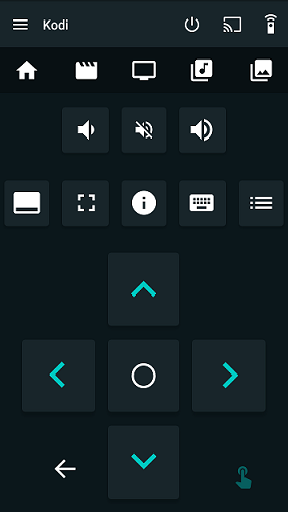
After 6-hour on and off, I got it up and run. Honestly I’m not a hardware guru, but I’m so happy not to throw this beautiful (my aesthetics is sort of quirky) box into the bin. I captured the home screen of Kodi, the media center and mobile control app.
Home page of kodai
Screenshot of kodi mobile app on my android phone.
How to start#
There is no wifi or bluetooth support on this model. I have to connect this tiny box to my switch via cable all the time. There is a small problem, because my switch is far away from my laptop, monitor, keyboard, etc. and I don’t have a cable long enough to connect the RPi and switch.
First thing first, I need to setup ssh server, and change the configuration to allow password login, also make it auto-start after reboot. To do so I just need monitor and keyboard.
Connect the RPi with monitor and keyboard#
- Reset pasword of
pi
sudo passwd piSSH server setup#
sudo apt-get install openssh-server

### backup default config
sudo cp /etc/ssh/sshd_config /etc/ssh/sshd_config.ori
sudo chmod a-w /etc/ssh/sshd_config.ori

### use any editor to update sshd_config
sudo nano /etc/ssh/sshd_config

### uncomment  PasswordAuthentication yes to allow remote password login

### setup ssh auto-start onboot
sudo update-rc.d ssh defaults

### reboot
sudo reboot

### Check the ssh is running after reboot
sudo service ssh status

### You should see sth as below
[ok] sshd is running

### Turn off Pi
sudo poweroff
Connect RPi with the switch#
After all above is done, you can disconnect the monitor and keyboard, and connect the RPi with the switch (or modem). Once the power is on, you should be able to access the RPi from you PC or laptop.
Find the ip address#
Access the admin home page of my switch via browser. e.g. http://192.168.0.1/index.html (The actual URL depends on your switch or modem. You can find it on the label sticked on the back or bottom.)
If you forget your password to login the admin page, you still can reset your swtich. If your modem is 3 in 1 model including switch, you need to make sure you have the ID and Password to access the internet before you reset it.
After you login successfully, you just need to expand main menus find a menu called DHCP. e.g.
Basic Setup
|__ ...
Advanced Setup
|__ ...
Device
|__ DHCP
|__ WAN
|__ ...
You will see table as blew.
| Hostname | MAC Address | IP Address | Expires In |
|---|---|---|---|
| PC-1 | 2f:3f:09:ff:f5:24 | 192.168.1.7 | x hours x mins |
| PC-2 | c0:9f:05:ff:f9:14 | 192.168.1.8 | x hours x mins |
| Laptop-1 | b0:f6:05:e2:f5:99 | 192.168.1.9 | x hours x mins |
| raspberrypi | a5:06:b2:07:c4:03 | 192.168.1.10 | x hours x mins |
Access RPi with your laptop#
- From Linux or Mac
ssh username@192.168.1.10

### type yes
### type the password - For widnows
You need to download a ssh tool. If you installed git before, you would have it on your computer. Otherwise, you need to install a SSH too. I recommend you to install Putty. It is free and quite handy.
After you install and launch Putty, you just need to type in the IP address 192.168.1.10 to the field Host Name (or IP Address), then click button Open.
### type in pi as login user
login as: pi

### type in password
pi@192.168.1.10's password:
Access RPi via VNC#
Setup VNC server on RPi#
sudo apt-get update
sudo apt-get install tightvncserver- Launch VNC server and setup pasword
/usr/bin/tightvncserver

### Setup password for remote access.
### View only password is not necessary

### setup VNC server to auto start
sudo update_rc.d tightvncserver defaults

sudo reboot
Setup VNC client on your PC#
Linux: Use xRDP I believe you can figure it out yourself, if you used Linux as desktop.
Windows: Install RealVNC Viewer as VNC client
- Laucn the VNC Viewer and create a new connection
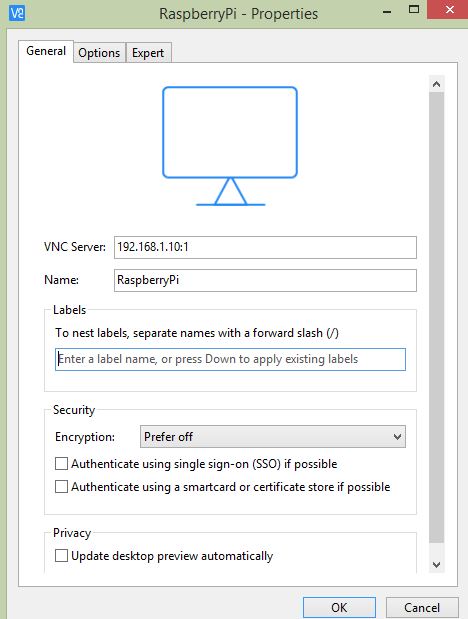
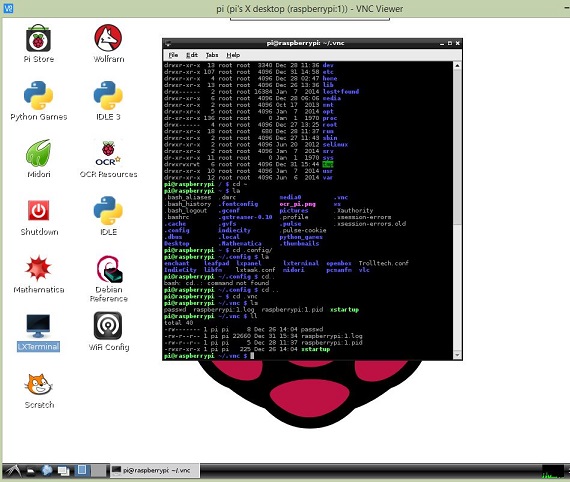
- Type in the VNC password and you can login RPi with GUI
After all above is done, you have your RPi ready. You can choose what you want to build on it. Considering its CPU and RAM, it is not sufficient to be used as daily desktop PC, but it is still enough to work as a server. e.g. File Server, Web Server, Email Server, FTP server or Media Center.
Now I want to make a file server and media center on it.
Setup File Server via Samba#
- Attach external storage to your RPi. The capacity of preinstalled SD card has only 8G space, so I attached my portal hard drives to RPi. You can attach the PC hard drive, USD or another SD card via adapter. It is really up to what you have in place.
I want to make one as public share folder without authentication, and the other needs password to access.
- If your hard drive or USB is
ntfs, the RPi might not recognize your device. You can simply install a package to make it work.
sudo apt-get install ntfs-3g- Get drive info after attach two hard drives
sudo lsblk

### You will see the tree structure of drives
NAME        MAJ:MIN RM   SIZE RO TYPE MOUNTPOINT
sda           8:0    0   1.8T  0 disk
└─sda1        8:1    0   1.8T  0 part /media/mydrive1
└─sda2        8:2    0   870G  0 part /media/mydrive2
mmcblk0     179:0    0   7.4G  0 disk
├─mmcblk0p1 179:1    0    56M  0 part /boot
└─mmcblk0p2 179:2 0 7.4G 0 part /- Remount the drives with proper name
sudo su ### switch to root
cd /media
umount mydrive1
umount mydrive2

mkdir public private
mount -o rw /sda/sda1 public
mount -o rw /sda/sda2 private- Change
fstabto support read and write permission
sudo nano /etc/fstab- Add following lines to the end of file. The format type of my drives are
ntfs. If you are not sure what file system type is, you can run this command to checksudo lsblk -o name,fstype
/dev/sda1  /media/public       ntfs   nofail,noatime    0    0
/dev/sda2 /media/private ntfs nofail,noatime 0 0- After you complete above changes, you will see the difference by typing the command
sudo lsblk
NAME        MAJ:MIN RM   SIZE RO TYPE MOUNTPOINT
sda           8:0    0   1.8T  0 disk
└─sda1        8:1    0   1.8T  0 part /media/public
└─sda2        8:2    0   870G  0 part /media/private
mmcblk0     179:0    0   7.4G  0 disk
├─mmcblk0p1 179:1    0    56M  0 part /boot
└─mmcblk0p2 179:2 0 7.4G 0 part /- Install Samba
sudo apt-get update
sudo apt-get upgrade
sudo apt-get install samba samba-common-bin- Setup Samba configuration
Backup original config and update the config#
sudo su
cd /etc/samba
cp smb.conf smb.conf.ori

nano smb.conf
Change the line below:#
* `wins support = no` to `wins support = yes`
Add follow lines to end of the file#
[public]
comment = Share Folder
path = /media/public
create mask = 0665
directory mask = 0775
read only = no
guest ok = yes

[private]
comment = Private Folder
path = /media/private
valid users = root,smbu
force user = smbu
create mask = 0777
directory mask = 0777
writable = yes
browsable = yes
read only = no
guest ok = yes
Add new user smbu for remote access. In case you#
sudo useradd smbu
sudo passwd smbu
sudo usermod -a -G root smbu
sudo smbpasswd smbu ## setup pasword for remote access
Access the network folder#
Linx#
I have no any problem to access the both netowrk drives via Linux.
Windows#
It took me some time to make it work for me. There are some bullet points, which may help you for trouble shooting.
- Please use
WORKGROUPinstead of domain. - Please keep name of workgroup as
WORKGROUP - Turn on the network discovery
Control Panel > All Control Panel Items> Network and Sharing Cente > Advanced sharing settings - Reboot the PC or laptop
Get accurate version of RPi model#
- Get the revision code
cat /etc/cpuinfo- Check the table below to find your model
| MODEL AND PI REVISION | MEMORY | HARDWARE REVISION CODE FROM CPUINFO |
|---|---|---|
| Model B Revision 1.0 | 256MB | 0002 |
| Model B Revision 1.0 + ECN0001 (no fuses, D14 removed) | 256MB | 0003 |
| Model B Revision 2.0 Mounting holes | 256MB | 0004 0005 0006 |
| Model A Mounting holes | 256MB | 0007,0008,0009 |
| Model B Revision 2.0 Mounting holes | 512MB | 000d 000e 000f |
| Model B+ | 512MB | 0010 |
| Compute Module | 512MB | 0011 |
| Model A+ | 256MB | 0012 |
| Pi 2 Model B | 1GB | a01041 (Sony, UK) a21041 (Embest, China) |
| PiZero | 512MB | 900092(no camera connector) 900093(camera connector) |
| Pi 3 Model B | 1GB | a02082 (Sony, UK) a22082 (Embest, China) |
| PiZero W | 512MB | 9000c1 |
Setup Wifi Adapter#
Wifi adapter is not necessary for media centre, but it would save some effort to move your RPi around in your place, especially you want to connect your RPi with different devices from time to time.
I bought a D-Link adapter, which is dwa-131 with usb 2.0. This is the oldest one I can find in the store. If you are going to buy wifi adapter for old Unix-like system, please don’t buy the latest model. You will find you are trapped into incompatible issue between wifi drive and Linux kernel. You may have to upgrade the kernel or rebuild the drive.
As you know, there is always some hiccup to find the correct wifi drive to support your portable wifi adapter. It took me a while to find the proper way to install the wifi adapter drive. If you have the RPi 2⁄3, it would be much more easier. My RPi 1 model B comes with kernel 4.1.18*. I cannot find the source code of wifi drive which supports this old kernel today, and I don’t want to upgrade and rebuild the kernel.
Finally, I found a post on RPi’s forum which solved my problem. Link of MrEngman’s post. He updated on April aobut the dropbox issue and alternative solution.
Download and install the new version of the script with commands
sudo wget http://www.fars-robotics.net/install-wifi -O /usr/bin/install-wifi
sudo chmod +x /usr/bin/install-wifi

### Shows details on using it.
sudo install-wifi -h


### To install the driver on your current kernel you should just need to run command
sudo install-wifi

### Check the wifi interface after installation
ifconfig -a
Setup Wifi password. You can simply do it via GUI application or via command lines if you like. Please check out the official document as below.
https://www.raspberrypi.org/documentation/configuration/wireless/
Install Kodi as media centre#
If you have NOOBS in the place, then you have everything you need. Because I don’t have it, I follow the official instruction to install kodi. It is a simple way to convert your RPi into a media centre without scratching your head too much.
### Install kodi
sudo apt-get update
sudo apt-get install kodi


### Config kodi
sudo nano /etc/default/kodi
ENABLED=1
Reboot the RPi, before you reboot it please make sure your TV’s HDMI has plugged into RPi. After a couple minutes, you will see the home page as I posted above. Don’t forget to install remote control app on your mobile. I pretty sure you find some remote control app for Kodi on your phone. Finally, you can enjoy your home media center.